  ® ®
|
Rehabilitating the CBX alternator drive
How to deal with the problem of a bad alternator drive. Many of the images can be enlarged by clicking on them. I have added some thoughts to the end of the article. Check it out. |
|
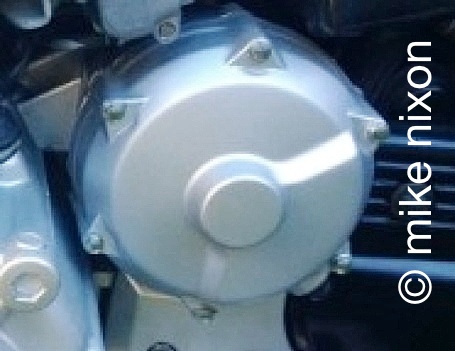
The Honda CBX1000 has a somewhat unusual alternator. To keep the engine width compact the alternator is mounted behind the cylinders on a separate shaft driven by the crankshaft through the primary chain. While not the only motorcycle having its alternator fitted in this way, it is not common either. |
|
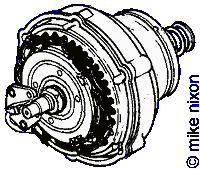
What makes this alternator really unusual is the way it is driven, through a two-piece clutch arrangement located behind the unit. The clutch is there to take the torque peak off the driving part, the layshaft, a hollow, lightweight shaft that drives the ignition system on its other end. |
|
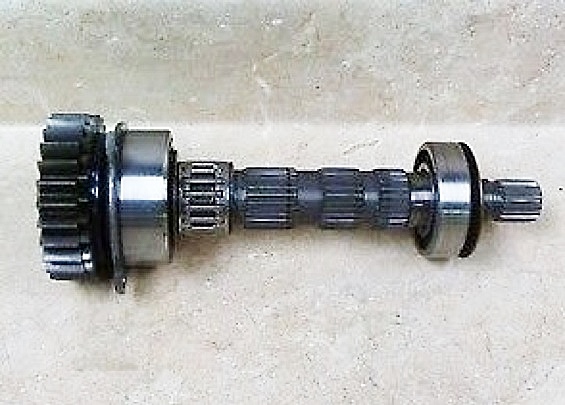
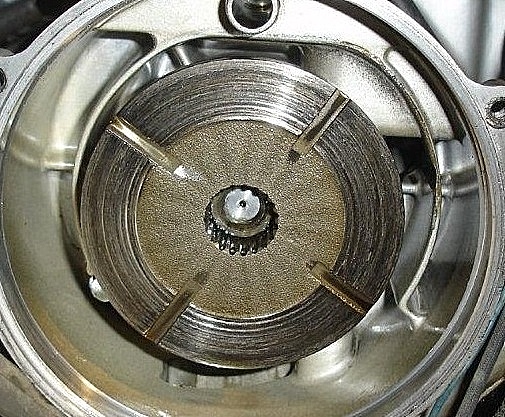
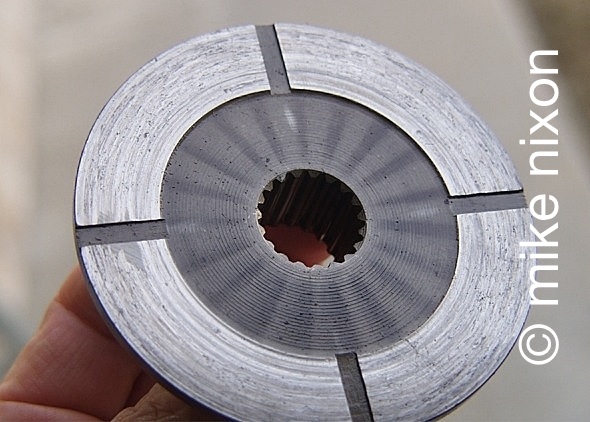
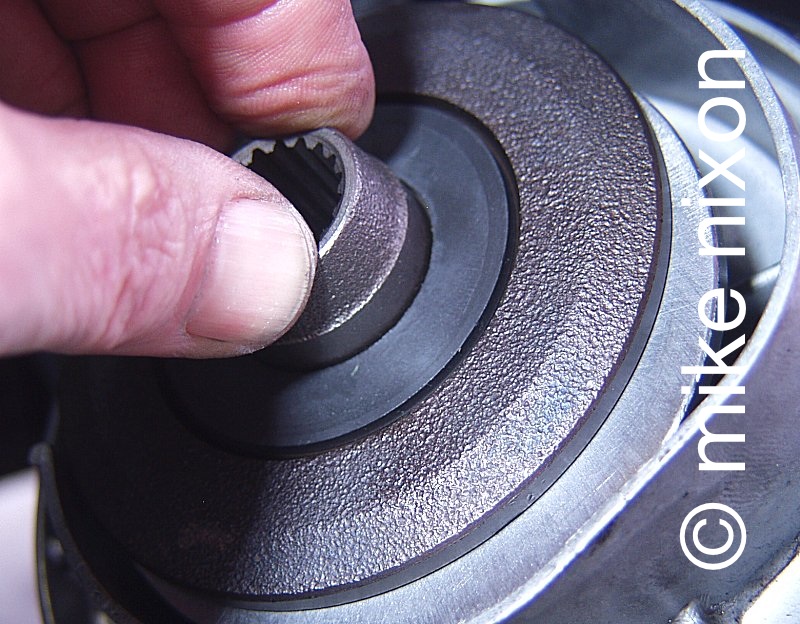
This is that primary shaft. The alternator is splined to the right hand end, the ignition is gear-driven from the left hand end, and the starter clutch and chain drive from the crankshaft go in the center. |
|
Another view. Same orientation as the picture above. The ignition goes on the left end. The primary chain from the crankshaft can be seen in the right foreground. The alternator would mount on the far right in this picture, actually out-of-frame. |
|
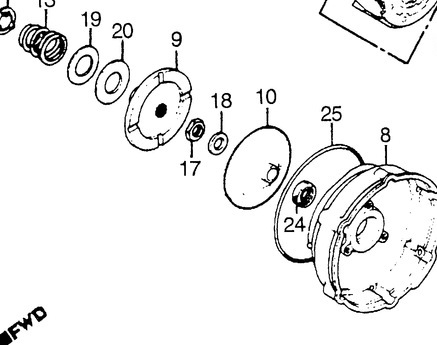
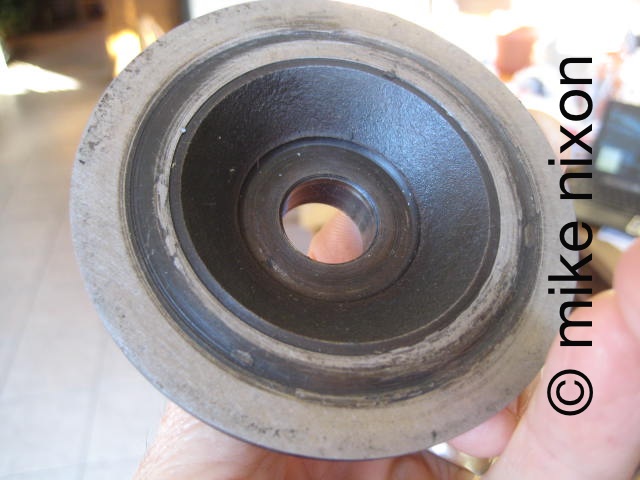
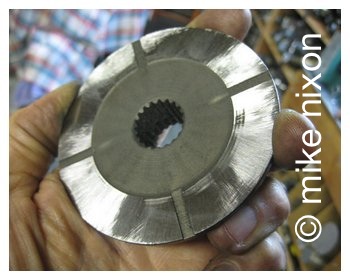
The clutch consists of two spring-loaded discs. One, the splined engine side disc, is shown here. The mating disc is bolted to the alternator itself, which is removed in this picture. |
|
Here's another view. Counting from the rear, you have a spring, two washers, and the drive plate. Then the nut and washer that fixes the driven plate, and the driven plate itself, its oil seal, the housing o-ring, and finally the housing in the foreground. |

|
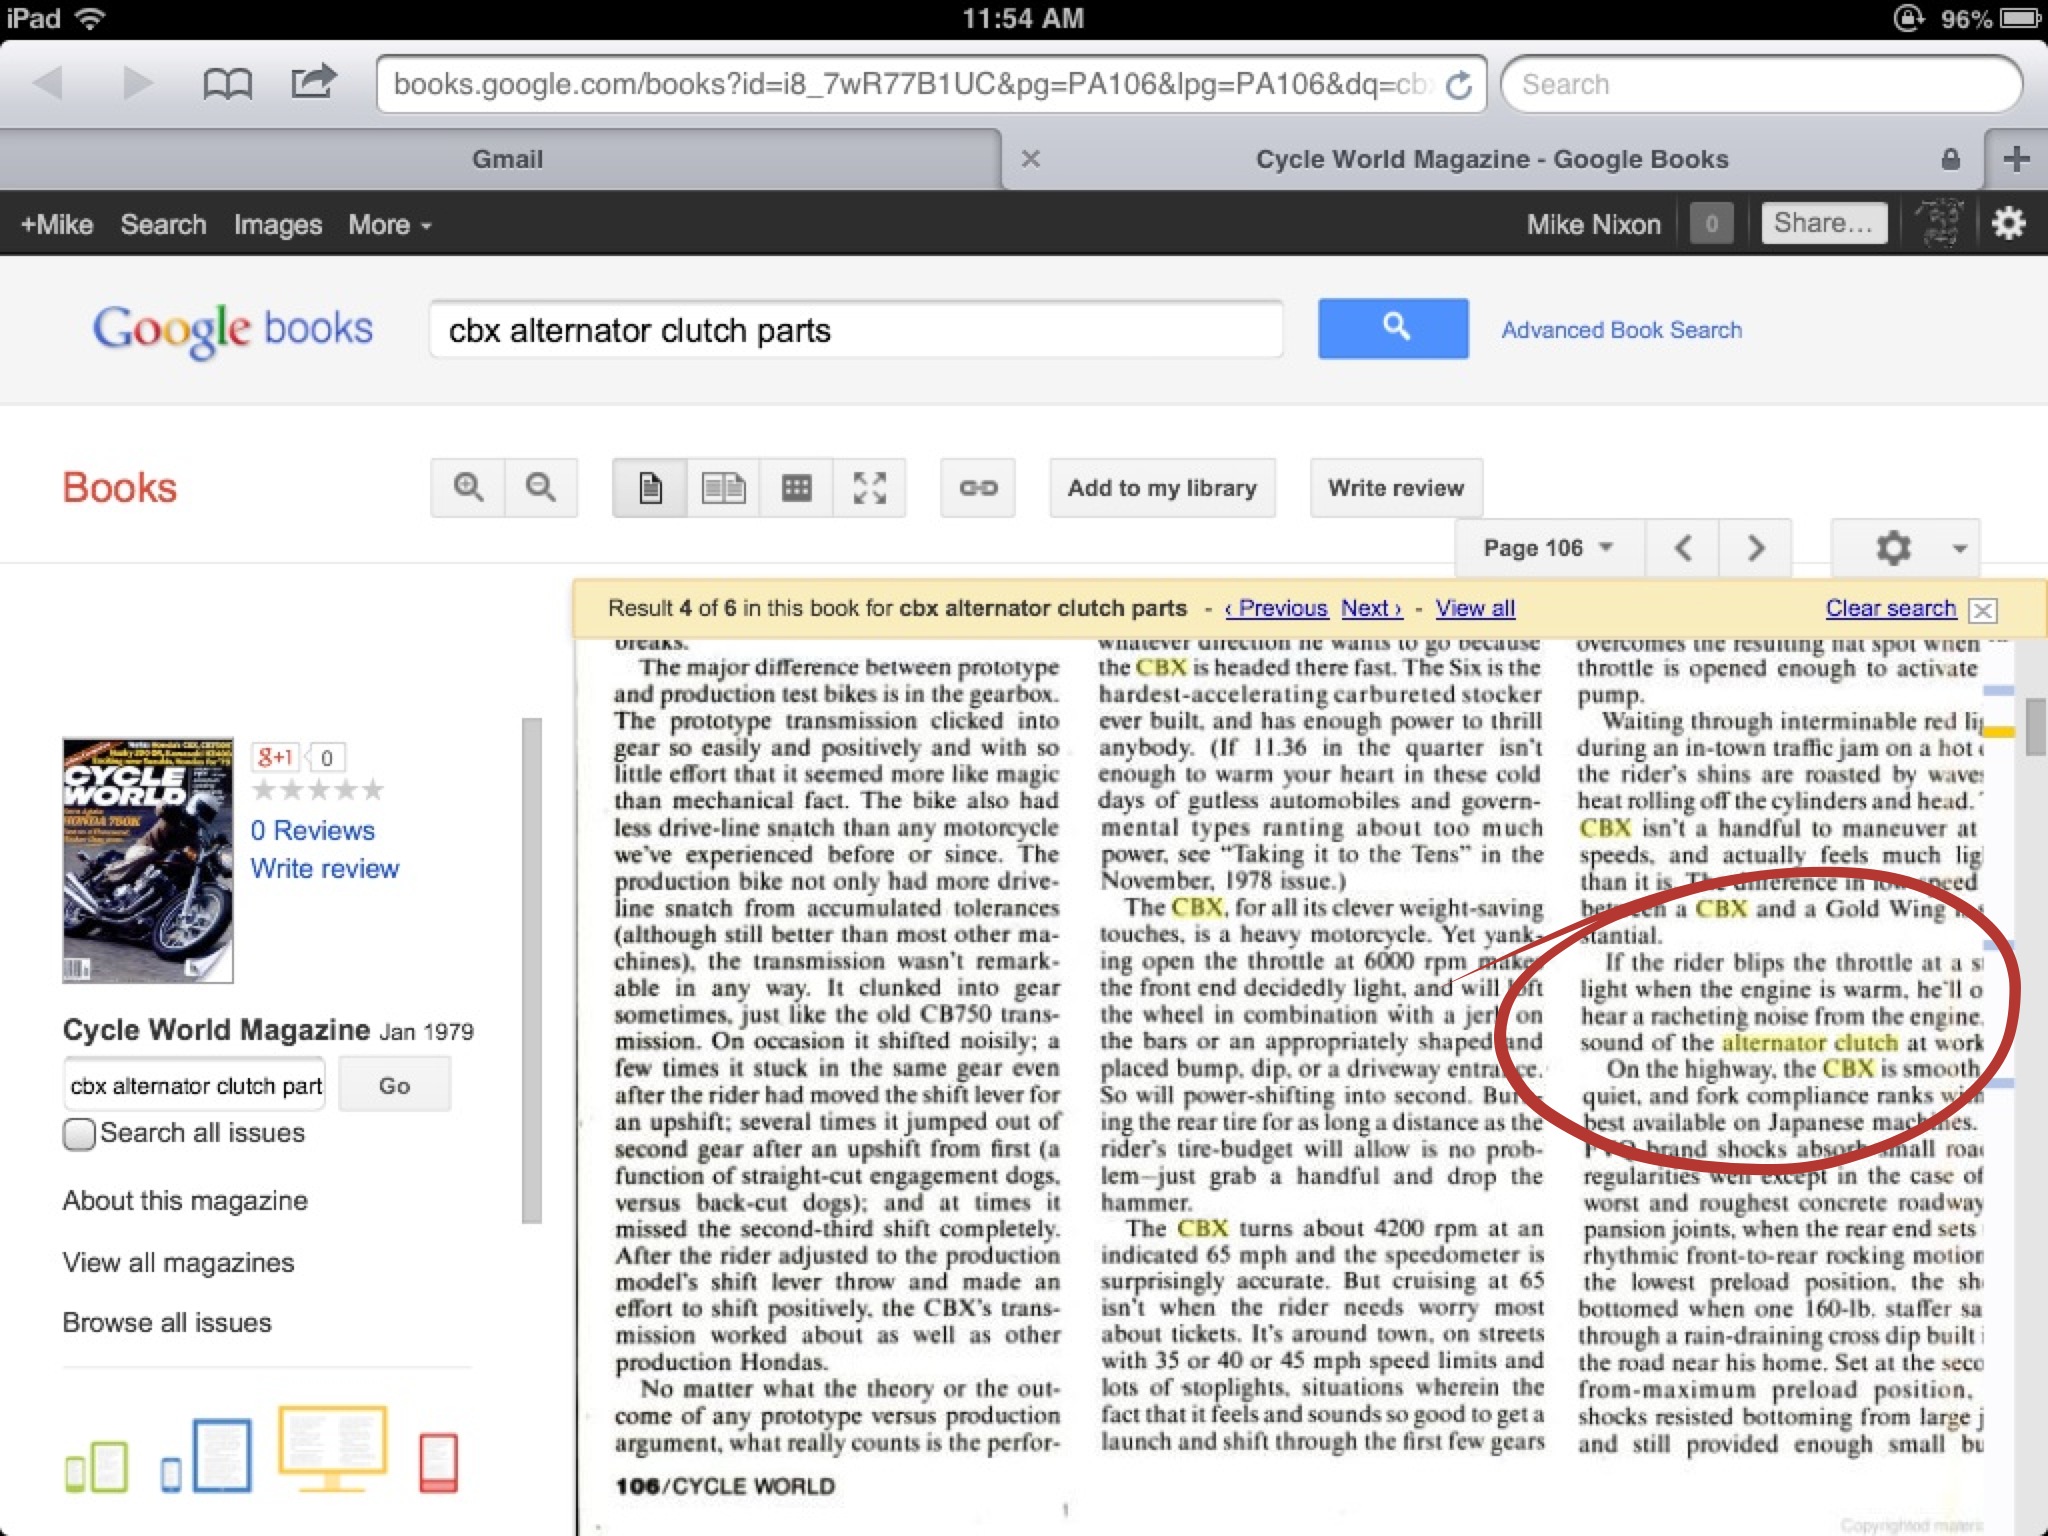
This system develops an issue pretty much immediately. See the magazine article. The symptom can take two audible forms. It can be either a valve-like high-frequency rattle / rolling tick at very low speeds with large throttle opening (coming out of a slow corner). Or it may appear when decelerating from high rpm, when it is usually described as a "clack." In addition, the sound is often accompanied by a lower average onboard voltmeter reading. |
|
The fault in the system lies in a design error, Honda admitted in an internally-circulated memo (I worked for the corporate office at the time). This memo reveals the problem and suggests no remedial action be taken on the part of the company. |
|
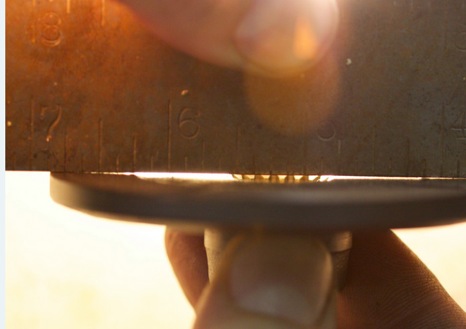
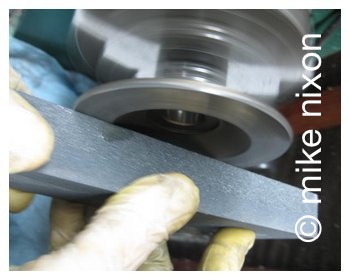
Here is the problem demonstrated with a straightedge. The engine side disc is manufactured cupped. Thank you Nils Menten! Click on the picture to enlarge. What this means is two things. First, as is apparent here and as the memo describes, the two plates touch each other only at their edges (5mm worth, according to the memo). This is a bad situation. It is not enough contact to carry the load. Further, it means, again as the memo suggests, that the discs are predisposed to wear rapidly. Tear themselves up, actually. |
|
This is an example of the result. This engine side disc has only 18,000 miles on it. The whole surface is galled and torn. The disc set this disc came from was probably slipping more or less full time. This disc was later successfully rehabilitated, there being no deep gouges. We'll look at how it was done. |

|
And here is one from a school bike, one with just 12 miles. You can still see the as-manufactured cross-hatch on the surface, but also, the gouging that has already begun. In 12 miles. So you see, the damage starts immediately. |
|
Here's another example, this one an alternator side disc with a lot more miles than either of the previous ones, but showing the same wear pattern as the last one. There's that trench that has been ground into the disc, as metal tore then balled up and skated. The gouging is so deep that to remove it would unfortunately thin the disc excessively. This disc set had to be replaced. |
|
Something to keep in mind when thinking about all this disc damage--not only does it affect the discs' function, and the eventual output of the alternator, but perhaps potentially worst of all, the alternator's drive clutch is housed inside the engine's crankcases, that is, in its oil supply. Thus the resulting metal debris pollutes the oil. |

|
So here is the repair process. First determine if the discs are salvagable. Specifically, this means the deepest gouges have to be under 1mm (0.040") deep and preferably under 0.020". |
|
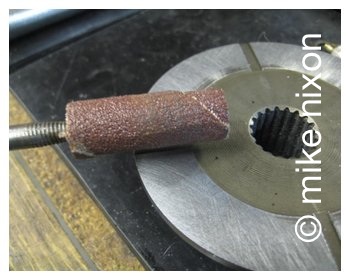
Start the repair by getting the surface flat again. Here I am applying a coarse whetstone to a disc on a lathe. |
|
This is what the results of this first stage look like. The discs are too rough at this point to go back into service, but their surfaces are beginning to take a normal shape again. |

|
Next, the discs are sanded on very coarse (80~100) emery paper laid on a sheet of glass. Use a circular or figure-eight motion to distibute the pressure and finish uniformly. Apply solvent or WD-40. |
|
Once the surfaces of both discs are smooth, it is time to radius all edges, outside, inside, and especially the oil grooves on the engine side disc which if not radiused will promote future galling. |
|
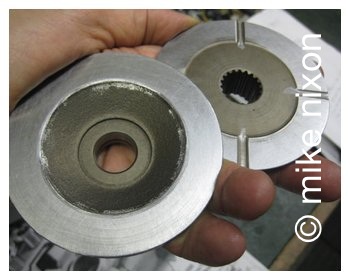
Here you see the two discs ready to be installed. Wash them well with your favorite solvent, follow with soap and water and brake cleaning spray to ensure no grit remains, and install them. |
|
An impact gun is virtually mandatory to remove and reinstall the alternator side disc if you expect to do so without disassembling the entire alternator. |

|
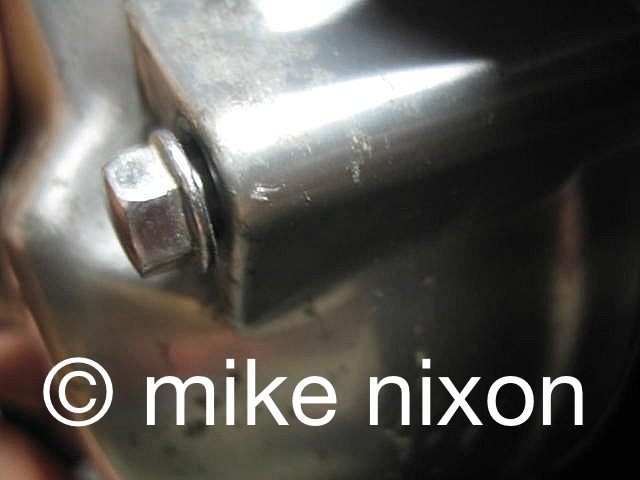
The engine side disc needs to be checked for working surface. You need to have at least a millimeter left of wear surface in order to clear the driven disc's fixing nut. |
|
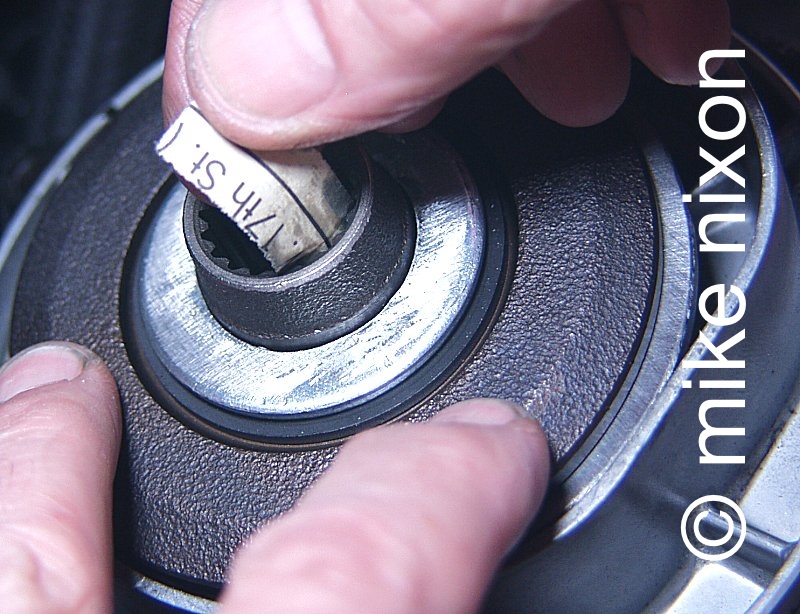
A quick and dirty test is to simply slide the drive disc against the driven disc and see if the nut on the driven disc catches. |
|
Take the test a step further and put the drive disc back onto the driven, and see if the shaft is going to interfere by slipping the paper out. If the paper slips out okay, the shaft is clearing good because the hole allows it clearance. |
|
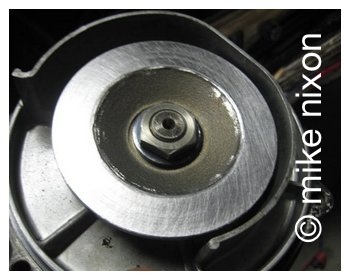
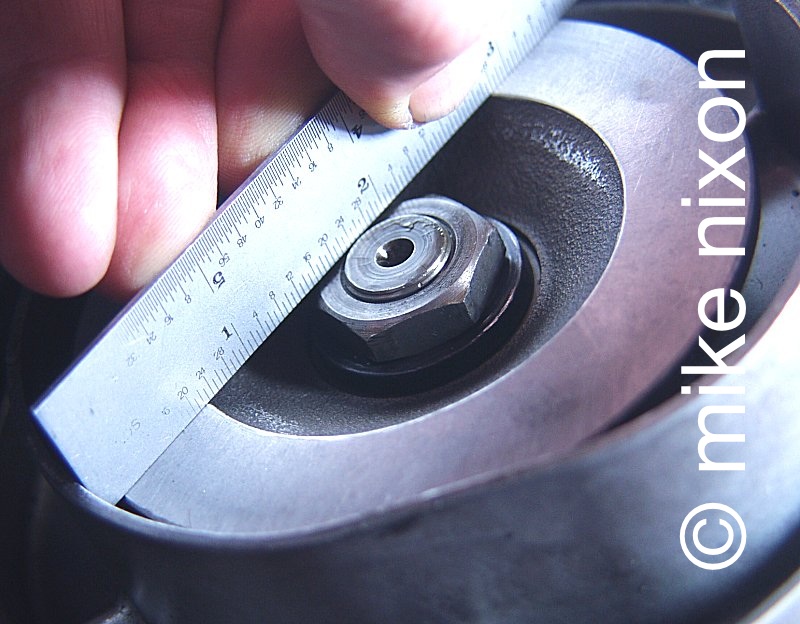
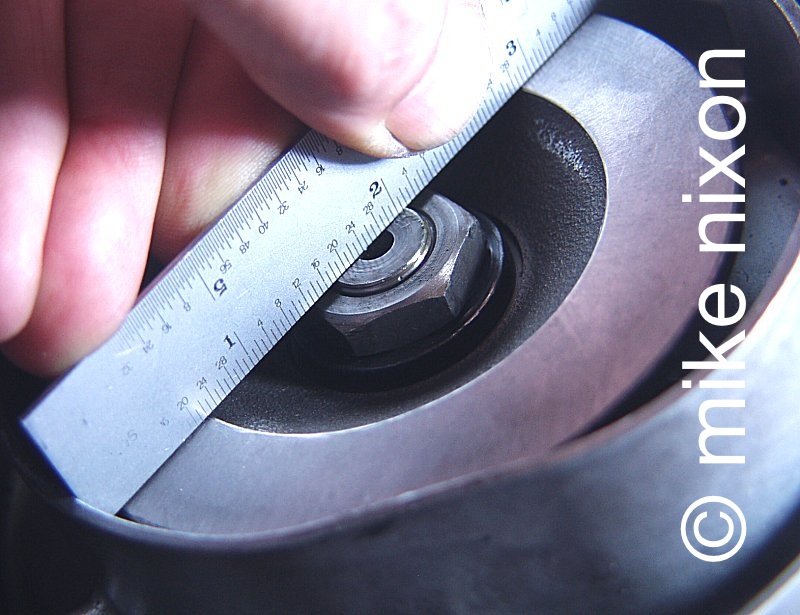
And this is why that is important. The nut on the driven side is pretty close to the level of the driven disc, and the shaft is even a bit higher yet. |
|
Here you can see how much higher the shaft is above the nut. |
|
|
Now, to compensate for all the metal that was removed from the discs, we need to add a shim. I have this shim. |
|
And don't let anyone tell you otherwise. That extra preload is needed. This clutch isn't supposed to slip like the clutch on your transmission. This is a breakaway clutch, not an engagement clutch. A breakaway clutch is a kind of one-time thing, not a continuous or even intermittent thing. You have the correct preload when the alternator mounting bolts can barely be started on one or two threads as you push hard on the assembly. In other words, the bolts are against spring pressure all the way in as you tighten them. As with anything, tighten gradually and evenly, turning each bolt just a half turn before doing its neighbors similarly. If you thread any bolt further than the other two, the whole alternator will bind and you will risk snapping a bolt, pinching the o-ring, pulling threads, or simply not getting the alternator seated squarely on the engine. Go slow. |
|
I want to emphasize that two things are important here. First, the bike was made with this problem, which means all CBXs have it unless it has been attended to. Second, note that the spring is not the focus of the repair. Don't waste time and effort measuring the spring or trying to determine how much it has sacked. What is the point? Your goal is to get the preload to that amount defined by having only a couple of threads to engage at the beginning of the install. |
|
|
|
Last updated November 2022 Email me © 1996-2022 Mike Nixon |